Setup
Requirements
Running the app locally requires a few steps and things to be installed on the host machine first.
Environment Variables
Environment variables are controlled for each of the containers and build targets via corresponding files within each section of the application's config folder. These env files are used solely for local development purposes and as such are named based on the environment they are attempting to emulate. Currently only a 'local development' version is provided, denoted by the .local suffix in the filename, but in the future additional configurations will be available for emulating AWS deployed development and staging application stacks. All environment variables that are used for actual deployments are handled via the CI/CD pipeline and are injected at build-time.
Any file named .env.example should not be modified, or have sensitive environment variables added to it, as these files are tracked and their contents will be uploaded to Github
Cashorbit-next
Currently there is only one environment definition for Cashorbit-next, and is used to run the environment in 'local' mode. See Local Mode. The environment variables in the .env.local file are not sensitive, and are safe to be committed. When additional environment targets are supported, additional .env.{target} files will be present.
Cashorbit-server
Currently there is only one environment definition for Cashorbit-server, and is used to run the environment in 'local' mode. See Local Mode.
In order for the container to build correctly, an env file named .env.local must be added to the ./cashorbit-server/config/ folder. This file will contain secret connection variables to allow the locally running API to connect to the staging database hosted on AWS. This file is included in the git-ignore to prevent these variables from being committed, and should not be added to the .env.example template file.
To get a copy of the local development env file, please contact a developer who will give it to you directly. TBD - working on getting env files included in a company 1password account.
Windows
Windows environments require a little more setup than other environments in order to get everything running.
- WSL2 Installation - It is recommended that the environment be running WSL2 for the most compatability with the features provided in the app. WSL setup instructions can be found Here
- Docker Desktop Installation - Docker Desktop is required for running the app locally. You can download Docker Desktop Here
- Docker Desktop Setup - In order to use Docker Desktop with the WSL environment you must do the additional configuration that is detailed Here
- Optional Additional setup - Depending on your IDE of choice, you can install the WSL extension for VSCode. When first running WSL, the console may prompt you to install additional docker libraries to communicate with the host Docker Desktop effectively.
Note: The docker CLI will not need to be manually installed in the WSL distro. this is handled automatically by Docker Desktop. The purpose of using WSL to facilitate running the containers is twofold; it contributes to environment-agnosticism by providing a unix development environment similar to other developers and the hosted environment, and provides compatability for running make commands.
Mac
Mac environments require minimal setup to get going.
- Docker Desktop Installation - Docker Desktop is required for running the app locally. You can download Docker Desktop Here
- Xcode CLI Tools Installation - To run make commands you will need to install the xcode cli. Run
xcode-select --installfrom any terminal.
Linux
Linux environments require a straightforward setup process to install the required packages.
Using your distro's package manager (apt-get used for example):
- Install necessary packages to use a repository over HTTPS
$ sudo apt-get update $ sudo apt-get install \ ca-certificates \ curl \ gnupg \ lsb-release - Add the official Docker GPG key
$ sudo mkdir -p /etc/apt/keyrings $ curl -fsSL https://download.docker.com/linux/ubuntu/gpg | sudo gpg --dearmor -o /etc/apt/keyrings/docker.gpg - Set up the repository and update the package index
$ echo \ "deb [arch=$(dpkg --print-architecture) signed-by=/etc/apt/keyrings/docker.gpg] https://download.docker.com/linux/ubuntu \ $(lsb_release -cs) stable" | sudo tee /etc/apt/sources.list.d/docker.list > /dev/null $ sudo apt-get update - Install the latest version
$ sudo apt-get install docker-ce docker-ce-cli containerd.io docker-compose-plugin
Note: For other Linux distros that do not support this method, please see installation instructions Here
Package Installation
It is not required to install node_modules in order to run the app, however your IDE's intellisense may complain about missing packages on import statements if you do not run npm install for each of the subfolders from the command line on your host system. The app can be run this way because each Docker installs node_modules in each container as part of the build process. To fix the intellisense issue, navigate into both cashorbit-server and cashorbit-next folders respectively and run npm install.
Docker-handled packages
During the build process, Docker will install each container's node_modules each time an image is built. In order to speed up build times, node_modules are cached between image builds. This allows the container to operate autonomously, regardless of the current state of the host's node_modules folder.
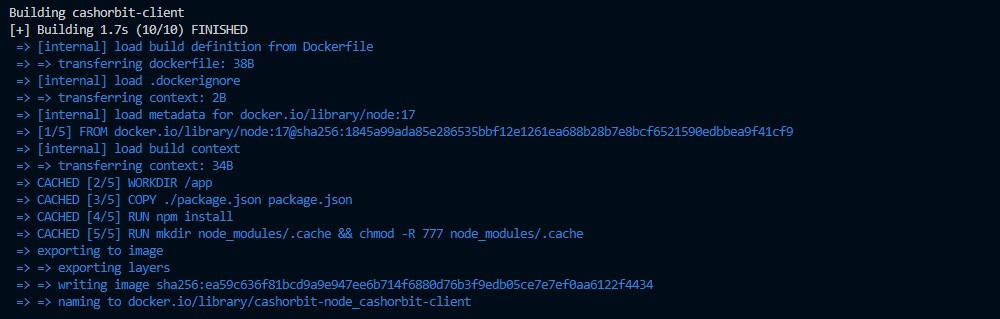
If you have an existing docker cache from a previous set of image builds, and you run the containers again, you will see an output from docker that looks like this: (note the CACHED [4/5] RUN npm install)
Adding new packages
Upon updating the host's package.json or package-lock.json, the Docker cache will be invalidated and will install fresh node_modules, reflecting the changes in the updated package files. This new set of node_modules will then be cached for use in future containers. This process is automatic, and should accurately occur only on package update, or cache expiry.
In the event that your container does not reflect new package changes If for some reason the container is not reflecting updated package chages, two different utility commands have been provided to resolve this issue. This can occur when a Docker image does not invalidate the cache for the node_modules, and instead reuses ones from a previous build. Despite being rare, this can occur.
- Use the command
make rebuild-environmentfrom the command line.
This forces Docker to completely rebuild all containers from scratch without using the cache. It will deprecate all existing images, but will continue to use the same data volumes provided to the previous containers, leaving data intact.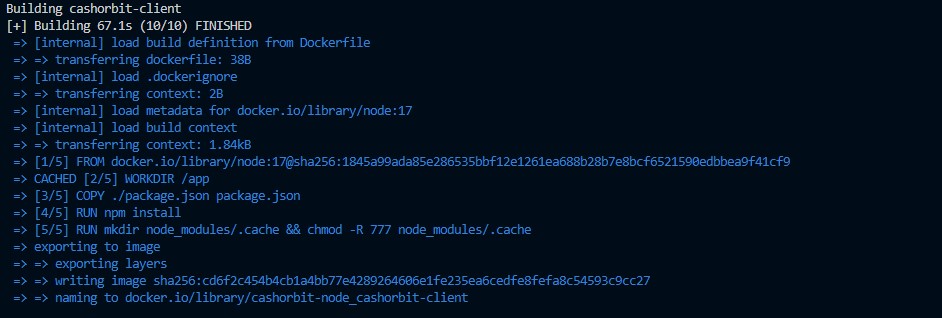
The downside to this option is that as you use it, 'orphaned' images add up which progressively take up disk space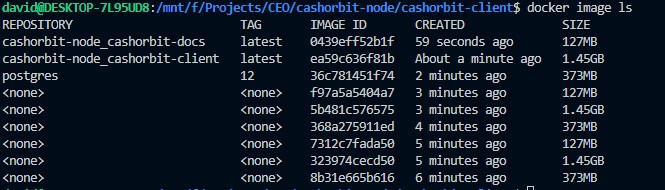
- use the command
make clear-containersfollowed by the commandmake clear-images
This achieves the exact same result, removing all images and their associated caches, and forcing them to be rebuilt on the next run command. This will also continue to use the same data volumes provided to the previous containers, leaving data intact.